|
|||
| Contents
|
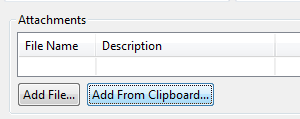
Image Paste and Edit in Fortress/EclipseWe checked in with Shannon Melfi, a developer on our team, about Fortress and Vault in Eclipse -- and in particular, about some cool new features which are seeing the light of day in Eclipse before moving on to other environments. Shannon has been with SourceGear since August, 2006 -- shortly after graduating from University of Illinois. She's worked mostly on our Eclipse plug-ins, with occasional diversions into Standalone Client and Web Client development. Lately, most of Shannon's time has been spent building and tweaking the Image Paste / Edit feature for the Eclipse Plug-in -- available in beta 1, although currently for Eclipse on Windows only. What's so cool about image pasting and editing?First of all, this is the first Fortress feature to show up in Eclipse before it's seen in Visual Studio or the Standalone client. Future betas (and the final release) will spread this feature wider, but for now, Eclipse users, it's all yours. The feature itself simplifies a very common process in submitting a Work Item -- you want a screenshot, maybe several, to illustrate the problem. So you need to capture it, save it to some sort of file using the tools you have at hand, then find it again and attach it to your bug. This frequently leads to full-screen images, embedded in Word documents, to demonstrate a single misbehaving field. Now, once you've started creating or editing a Work Item, go ahead and capture the screenshot to your clipboard (in Windows, PrtScn to get your whole screen, Alt-PrtScn for just the current Window). Now go back to Eclipse and your Work Item, and click "Add From Clipboard".
This pulls up the Image Preview window. You can see a preview of your screenshot; give it a name and description and you're done.
Or, you can edit the image before saving it by clicking "Edit..." In the Edit window, you can crop your screen shot:
use the pen tool to highlight key points:
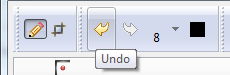
all with unlimited Undo:
When you're done, just click OK, save your Work Item, and your screen shot is attached. |
|